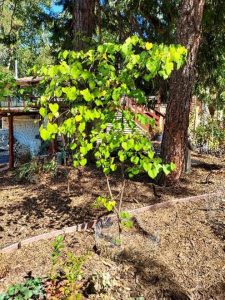
Transplanting trees is not difficult as long as the tree trunk is no more than two inches in diameter. (If the trunk is larger than two inches you’ll need a professional.)
Before transplanting a tree, choose the new site, assessing the sun/shade exposure that the tree needs and the future spacing requirements (how big will it get) including any neighboring plants. Then prep the tree to be transplanted at least a month to three months ahead of time. Transplanting needs to be done when the tree is dormant, either in late fall after it’s lost its leaves or in early spring before the first buds.
A month or more before transplantation, dig straight down with a sharp shovel about two feet out from the trunk around the roots of the tree in a circle. This cuts the roots prior to transplant and encourages the growth of new feeder roots. Make sure the tree stays hydrated, giving it the best chance for moving with minimal shock.
Once dormant, it’s time to prep for the move. You’ll need some supplies: burlap for wrapping around the roots, twine for tying the burlap, and a sharp shovel. A wheelbarrow can also be helpful.
A day or two before the move, water the tree and the new site. At this time, prune the tree as much as 1/3 to reduce the amount of foliage for the roots to support. You may also want to tie up some of the branches to make a smaller profile for transporting to the new site. Determine the size of the root ball; allow one foot per inch of diameter of the trunk.
The day of transplanting! Dig a hole at the new site – two to three times the width of the root ball and about one to two inches deeper than the root ball. Trench around the tree with the sharp shovel, following the dimensions of the root ball. Dig down one to two feet; then cut under the roots to round out the root ball.
Be sure to give yourself time and help for the next tricky and tedious part. It’s really important to keep the root ball as intact as possible. Cut the burlap piece large enough to cover the entire root ball. With help, tip the tree to the side and slide the burlap into the hole. Carefully roll the root ball onto the burlap and secure it with the twine. Lift the tree out of the hole by the bottom and carefully carry it to the new site (using the wheelbarrow, if necessary).
Place the tree in the new site with the top of the root ball just one or two inches above the ground level. Gently remove the burlap, or cut the burlap down to the base and leave the bottom in the ground. Tree support, if needed, should be added at this time. Fill the hole with surrounding soil, pack it lightly, and water well. No fertilizer or compost is needed or even appropriate.
For the next year, keep the tree deeply watered, providing about an inch of water per week. Mulch is helpful, but be sure it is not touching the trunk. (Confession: I talk with the tree during all these steps and assure it that all will be well.) Wait in anticipation for the beauty of the tree leafing out and adding beauty to its new site!
Nancy Bliss is a University of California Cooperative Extension Master Gardener of Tuolumne County.
UCCE Master Gardeners of Tuolumne and Calaveras Counties can answer home gardening questions. Call 209-533-5912 or go to or fill out our easy-to-use problem questionnaire here. Check out our website here. You can also find us on Facebook.

